GRASS-HRU
| Line 1: | Line 1: | ||
[[de:GRASS-HRU]] | [[de:GRASS-HRU]] | ||
| − | [[ | + | [[File:Grasshru.png|thumb|rechts|GRASS-HRU]] The complete process chain for the HRU derivation was implemented according to a service-oriented application in GRASS-GIS. The execution enironment is strictly separated from the operating environment by using a preconfigured, virtual machine which is in charge of data preparation and the calculation of HRUs in GRASS-GIS. A plug-in developed for QGIS creates an intuitive, wizard-driven and transparent environment for the execution of the process chain. |
==Download and Installation of GRASS-HRU== | ==Download and Installation of GRASS-HRU== | ||
| Line 14: | Line 14: | ||
=== Installing the VirtualBox === | === Installing the VirtualBox === | ||
| − | [[ | + | [[File:Vbox_setup.jpg|thumb|links|Installation von VirtualBox]] |
The derivation of HRUS with GRASS-GIS, which will be explained below, requires a virtualization software which hosts a linux system and all software and scripts needed. VirtualBox should be used - the current version 3.2.10 can be downloaded at | The derivation of HRUS with GRASS-GIS, which will be explained below, requires a virtualization software which hosts a linux system and all software and scripts needed. VirtualBox should be used - the current version 3.2.10 can be downloaded at | ||
http://www.virtualbox.org/wiki/Downloads. | http://www.virtualbox.org/wiki/Downloads. | ||
| Line 23: | Line 23: | ||
After a successful installation VirtualBox can be launched and the import of a preconfigured hard disk image can start: | After a successful installation VirtualBox can be launched and the import of a preconfigured hard disk image can start: | ||
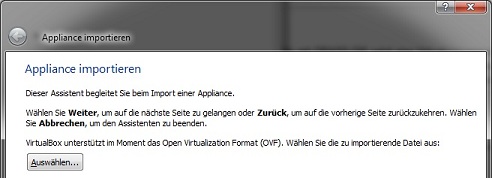
# Datei -> Appliance importieren | # Datei -> Appliance importieren | ||
| − | # Load the Appliance (see above) under '''Auswählen''' (file ''grass-hru.ovf'')<br/>[[ | + | # Load the Appliance (see above) under '''Auswählen''' (file ''grass-hru.ovf'')<br/>[[File:Import_app.jpg]]<br/><br/> |
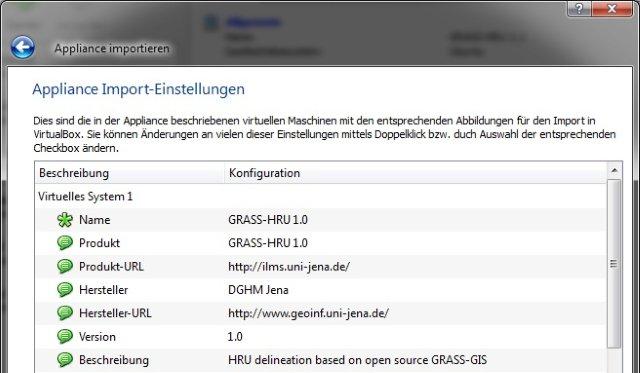
| − | # Apply the imported configuration of the Appliance and end the import process with '''Abschließen''' <br/>[[ | + | # Apply the imported configuration of the Appliance and end the import process with '''Abschließen''' <br/>[[File:Import_app_2.jpg]]<br/><br/> |
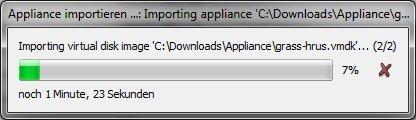
| − | # The appliance is being imported...<br/>[[ | + | # The appliance is being imported...<br/>[[File:Import_app_3.jpg]]<br/><br/> |
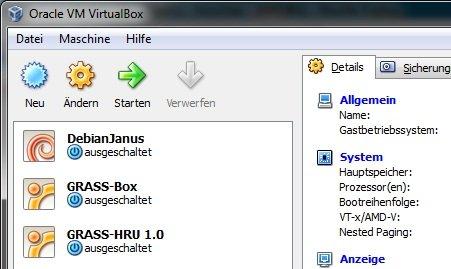
| − | # ...and will be available through an entry in the VirtualBox main window (GRASS-HRU 1.0)<br/>[[ | + | # ...and will be available through an entry in the VirtualBox main window (GRASS-HRU 1.0)<br/>[[File:Import_app_4.jpg]]<br/><br/> |
=== Installing QuantumGIS === | === Installing QuantumGIS === | ||
| − | [[ | + | [[File:Qgis_setup.jpg|thumb|links|Installation von QunatumGIS]]The current version of QuantumGIS is available at http://www.qgis.org/wiki/Download. The ''Standalone Installer'' is recommended - the download address for version 1.6 is http://qgis.org/downloads/QGIS-OSGeo4W-1.6.0-14615-Setup.exe. |
Please note: For the HRU derivation the GRASS plug-in for QuantumGIS is not required but it is included in the installer version 1.6. As an alternative, the installer version 1.4 of QuantumGIS can be used, which does not install a GRASS plug-in and therefore reduces the filesize. (http://qgis.org/downloads/QGIS-1.4.0-1-No-GrassSetup.exe) | Please note: For the HRU derivation the GRASS plug-in for QuantumGIS is not required but it is included in the installer version 1.6. As an alternative, the installer version 1.4 of QuantumGIS can be used, which does not install a GRASS plug-in and therefore reduces the filesize. (http://qgis.org/downloads/QGIS-1.4.0-1-No-GrassSetup.exe) | ||
| Line 38: | Line 38: | ||
#*../QuantumGIS/apps/qgis/python/plugins | #*../QuantumGIS/apps/qgis/python/plugins | ||
# start QuantumGIS | # start QuantumGIS | ||
| − | # Plugins -> Plugins verwalten<br/>[[ | + | # Plugins -> Plugins verwalten<br/>[[File:Qgis_plugin_2.jpg]]<br/><br/> |
| − | # Search for ''HRU WPS-Client'' in the ''QGIS Plugin Manager'', activate it and confirm with '''Ok''' <br/>[[ | + | # Search for ''HRU WPS-Client'' in the ''QGIS Plugin Manager'', activate it and confirm with '''Ok''' <br/>[[File:Qgis_plugin.jpg]]<br/><br/> |
| − | # The tool for HRU derivation can be started by using a separate button in the menu bar<br/>[[ | + | # The tool for HRU derivation can be started by using a separate button in the menu bar<br/>[[File:Qgis_plugin_3.jpg]]<br/><br/> |
==Preparation== | ==Preparation== | ||
Before starting the HRU derivation, the following steps have to be completed: | Before starting the HRU derivation, the following steps have to be completed: | ||
| − | # Run the newly created ''Virtual Appliance'' with the name "GRASS-HRU 1.0" by double-clicking on the corresponding entry on the VirtualBox window (or the button "Starten"). The following boot process in a separate window has to be carried out completely and can be minimized when the login prompt appears (do'''not''' close!). The virtual machine is working in the background during the whole HRU derivation process.<br/>[[ | + | # Run the newly created ''Virtual Appliance'' with the name "GRASS-HRU 1.0" by double-clicking on the corresponding entry on the VirtualBox window (or the button "Starten"). The following boot process in a separate window has to be carried out completely and can be minimized when the login prompt appears (do'''not''' close!). The virtual machine is working in the background during the whole HRU derivation process.<br/>[[File:Start_app_1.jpg]]<br/>Please note: By entering http://localhost:8080 in the address bar of the internet browser you can check if the virtual machine has been successfully started and if a connection with the machine is possible. A website containing the words "It works!" should appear. |
| − | # Click on ''Extras -> Netzlaufwerk verbinden'' in the Windows explorer and enter it as file '''http://localhost:8080/wps_inout'''. Additionally, you can choose a free hard disk letter, e.g. '''Z:'''. When finished, open the configuration file ''../plugins/hruwps/grass-hru.cfg'' and edit ''device'' in ''webdav'' section according to your chosen drive letter<br/>[[ | + | # Click on ''Extras -> Netzlaufwerk verbinden'' in the Windows explorer and enter it as file '''http://localhost:8080/wps_inout'''. Additionally, you can choose a free hard disk letter, e.g. '''Z:'''. When finished, open the configuration file ''../plugins/hruwps/grass-hru.cfg'' and edit ''device'' in ''webdav'' section according to your chosen drive letter<br/>[[File:Start_app_2.jpg]]<br/><br/>All input data should now be stored in this folder. The existing subfolder ''/gehlberg'' contains example data for input and result layers. New subfolders for the required input data can be created in the new network folder. |
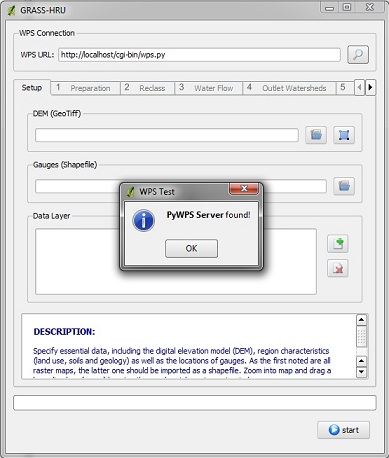
| − | # Now the plug-in can be started from QuantumGIS. In order to do so, start QuantumGIS and click on the GRASS-HRU-Icon (see above) - the plug-in for HRU derivation opens. By clicking on the magnifying glass to the right of the address bar a message on successful connection should appear. <br/>[[ | + | # Now the plug-in can be started from QuantumGIS. In order to do so, start QuantumGIS and click on the GRASS-HRU-Icon (see above) - the plug-in for HRU derivation opens. By clicking on the magnifying glass to the right of the address bar a message on successful connection should appear. <br/>[[File:Grass_hru_1.jpg]]<br/><br/> |
==Details on the HRU Derivation Using the Wizard== | ==Details on the HRU Derivation Using the Wizard== | ||
| Line 53: | Line 53: | ||
*Selection of additional data layers (land use, soil, geology) by clicking on the button ''Hinzufügen'' to the right hand side of the ''Data Layer'' chart. | *Selection of additional data layers (land use, soil, geology) by clicking on the button ''Hinzufügen'' to the right hand side of the ''Data Layer'' chart. | ||
*Opening a bounding box (first left mouse click: top left-hand corner, second left mouse click: bottom right-hand corner, right mouse click: delete bounding box). The resulting bounding box should comprise the complete catchment area to be analysed. | *Opening a bounding box (first left mouse click: top left-hand corner, second left mouse click: bottom right-hand corner, right mouse click: delete bounding box). The resulting bounding box should comprise the complete catchment area to be analysed. | ||
| − | [[ | + | [[File:Grass_hru_2.jpg]] |
===Step 1: Preparation=== | ===Step 1: Preparation=== | ||
*It is possible to delete local sinks from the DGM. In case the current DGM has not been filled yet, ''default filling'' should be selected from the methodology list. | *It is possible to delete local sinks from the DGM. In case the current DGM has not been filled yet, ''default filling'' should be selected from the methodology list. | ||
*For the calculation of slope and slope orientation no further input is necessary. | *For the calculation of slope and slope orientation no further input is necessary. | ||
| − | [[ | + | [[File:Grass_hru_3.jpg]] |
===Step 2: Reclass=== | ===Step 2: Reclass=== | ||
| Line 64: | Line 64: | ||
*The standard areas and values can be applied or modified. In case of a modification values cannot be below or above the corresponding minima and maxima. | *The standard areas and values can be applied or modified. In case of a modification values cannot be below or above the corresponding minima and maxima. | ||
*If a data set should not be used for HRU derivation, it can be deselected (Checkbox ''not required''). | *If a data set should not be used for HRU derivation, it can be deselected (Checkbox ''not required''). | ||
| − | [[ | + | [[File:Grass_hru_4.jpg]] |
===Step 3: Waterflow=== | ===Step 3: Waterflow=== | ||
| Line 70: | Line 70: | ||
*This parameter determines, for example, the degree of detail of the water network or the number of partial catchment areas. The threshold value determines the smalles, derivable partial catchment area and is indicated in cells (number of pixels). | *This parameter determines, for example, the degree of detail of the water network or the number of partial catchment areas. The threshold value determines the smalles, derivable partial catchment area and is indicated in cells (number of pixels). | ||
*Example: A value of 1500 (and an assumed solution of 25m) results in a designation of partial catchment areas bigger than (1500*25*25)/1000000 = 0.9375km² ~ 1km². | *Example: A value of 1500 (and an assumed solution of 25m) results in a designation of partial catchment areas bigger than (1500*25*25)/1000000 = 0.9375km² ~ 1km². | ||
| − | [[ | + | [[File:Grass_hru_5.jpg]] |
===Step 4: Outlet Watersheds=== | ===Step 4: Outlet Watersheds=== | ||
| Line 76: | Line 76: | ||
*#Pan the water level and supply map up in the key, so both data sets are visible. | *#Pan the water level and supply map up in the key, so both data sets are visible. | ||
*#Check with the zoom tool whether the singular water levels lie exactly on the derived water supply network. If not, modify the level layer until '''all levels in the watershed''' lie on the water sections. To do so, please proceed as follows: | *#Check with the zoom tool whether the singular water levels lie exactly on the derived water supply network. If not, modify the level layer until '''all levels in the watershed''' lie on the water sections. To do so, please proceed as follows: | ||
| − | *##Select the level layer on the key and activate the vector editing mode of QuantumGIS [[ | + | *##Select the level layer on the key and activate the vector editing mode of QuantumGIS [[File:Qgis_tool_1.jpg|30px]] |
| − | *##Take the tool for panning vector points [[ | + | *##Take the tool for panning vector points [[File:Qgis_tool_2.jpg|30px]] and relocate the corresponding watersheds |
| − | *##Finally, cancel the edit mode by clicking on [[ | + | *##Finally, cancel the edit mode by clicking on [[File:Qgis_tool_1.jpg|30px]] again and agree to save changes |
| − | *#If all water levels in the catchment area have the correct position in the water network, those levels relevant to the calculation have to be selected - use the marker tool [[ | + | *#If all water levels in the catchment area have the correct position in the water network, those levels relevant to the calculation have to be selected - use the marker tool [[File:Qgis_tool_3.jpg|30px]]. |
*Choose the shapefile attribute on the selection list ''Name of corresponding attribute (ID)'' which represents a unique parameter for the level ('''integer and > 0''', e.g. level ID). | *Choose the shapefile attribute on the selection list ''Name of corresponding attribute (ID)'' which represents a unique parameter for the level ('''integer and > 0''', e.g. level ID). | ||
| − | [[ | + | [[File:Grass_hru_6.jpg]] |
===Step 5: Overlay=== | ===Step 5: Overlay=== | ||
| Line 87: | Line 87: | ||
*For this purpose a threshold value is defined (''Size of smallest area to remove'') which determines the minimum size of an HRU (in cells). | *For this purpose a threshold value is defined (''Size of smallest area to remove'') which determines the minimum size of an HRU (in cells). | ||
*Example: A value of 8 (and an assumed solution of 25m) results in a designation of HRUs which is bigger than (8*25*25) = 5000m² =0.5ha | *Example: A value of 8 (and an assumed solution of 25m) results in a designation of HRUs which is bigger than (8*25*25) = 5000m² =0.5ha | ||
| − | [[ | + | [[File:Grass_hru_7.jpg]] |
===Step 6: Topology=== | ===Step 6: Topology=== | ||
| Line 96: | Line 96: | ||
**water topology (topological combination of all river sections) | **water topology (topological combination of all river sections) | ||
*The option ''Enable discrete reaches'' is an extension of the topological derivation and its development has not yet been finished. | *The option ''Enable discrete reaches'' is an extension of the topological derivation and its development has not yet been finished. | ||
| − | [[ | + | [[File:Grass_hru_8.jpg]] |
===Step 7: Statistics=== | ===Step 7: Statistics=== | ||
*The existing HRU map in grid format (Geo Tiff) is now converted into a shapefile. In doing so, additional features of a single HRU can be selected which are taken to the attribute chart or are supposed to be calculated. | *The existing HRU map in grid format (Geo Tiff) is now converted into a shapefile. In doing so, additional features of a single HRU can be selected which are taken to the attribute chart or are supposed to be calculated. | ||
| − | [[ | + | [[File:Grass_hru_9.jpg]] |
Revision as of 10:44, 5 December 2011

Contents |
Download and Installation of GRASS-HRU
Downloading the Hard Disk Image (Virtual Appliance) and QGIS-Plugin
The following files should be downloaded from http://www.geoinf.uni-jena.de:
- grass-hru.mf
- grass-hru.ovf
- grass-hrus.vmdk
Together they create a so-called Virtual Appliance which will be required in the following section. In addition, the QGIS plug-in for HRU derivation should be downloaded from the same website:
- hruwps.zip
Installing the VirtualBox

The derivation of HRUS with GRASS-GIS, which will be explained below, requires a virtualization software which hosts a linux system and all software and scripts needed. VirtualBox should be used - the current version 3.2.10 can be downloaded at http://www.virtualbox.org/wiki/Downloads. The wizard leads you through the steps of the installation process. It should be noted that:
- a temporary deactivation of the network connection is necessary and therefore not unusual
- all necessary drivers should be installed
After a successful installation VirtualBox can be launched and the import of a preconfigured hard disk image can start:
- Datei -> Appliance importieren
- Load the Appliance (see above) under Auswählen (file grass-hru.ovf)
- Apply the imported configuration of the Appliance and end the import process with Abschließen
- The appliance is being imported...
- ...and will be available through an entry in the VirtualBox main window (GRASS-HRU 1.0)


Installing QuantumGIS

Please note: For the HRU derivation the GRASS plug-in for QuantumGIS is not required but it is included in the installer version 1.6. As an alternative, the installer version 1.4 of QuantumGIS can be used, which does not install a GRASS plug-in and therefore reduces the filesize. (http://qgis.org/downloads/QGIS-1.4.0-1-No-GrassSetup.exe)
Installing the Plug-in
To install the actual plug-in for HRU derivation in QuantumGIS the following steps have to be followed:
- Unzip the zip archive hruwps.zip, which has been dowloaded (see above), into the plug-in file of QuantumGIS. According to the QuantumGIS version the folder is called
- ../QuantumGIS/python/plugins or
- ../QuantumGIS/apps/qgis/python/plugins
- start QuantumGIS
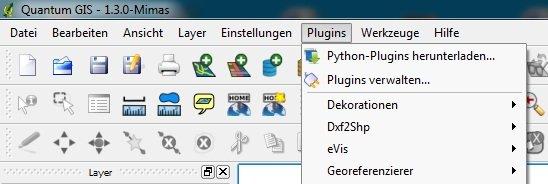
- Plugins -> Plugins verwalten
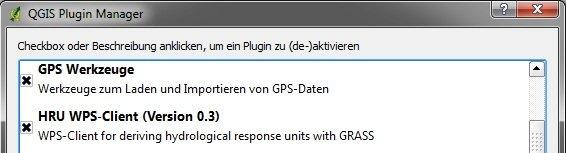
- Search for HRU WPS-Client in the QGIS Plugin Manager, activate it and confirm with Ok
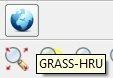
- The tool for HRU derivation can be started by using a separate button in the menu bar


Preparation
Before starting the HRU derivation, the following steps have to be completed:
- Run the newly created Virtual Appliance with the name "GRASS-HRU 1.0" by double-clicking on the corresponding entry on the VirtualBox window (or the button "Starten"). The following boot process in a separate window has to be carried out completely and can be minimized when the login prompt appears (donot close!). The virtual machine is working in the background during the whole HRU derivation process.

Please note: By entering http://localhost:8080 in the address bar of the internet browser you can check if the virtual machine has been successfully started and if a connection with the machine is possible. A website containing the words "It works!" should appear. - Click on Extras -> Netzlaufwerk verbinden in the Windows explorer and enter it as file http://localhost:8080/wps_inout. Additionally, you can choose a free hard disk letter, e.g. Z:. When finished, open the configuration file ../plugins/hruwps/grass-hru.cfg and edit device in webdav section according to your chosen drive letter
File:Start app 2.jpg
All input data should now be stored in this folder. The existing subfolder /gehlberg contains example data for input and result layers. New subfolders for the required input data can be created in the new network folder. - Now the plug-in can be started from QuantumGIS. In order to do so, start QuantumGIS and click on the GRASS-HRU-Icon (see above) - the plug-in for HRU derivation opens. By clicking on the magnifying glass to the right of the address bar a message on successful connection should appear.


Details on the HRU Derivation Using the Wizard
Step 0: Setup
- Selection of the digital terrain model (DGM) in GeoTiff format and a shapefile format, each by using the button Datei next to the input field.
- Selection of additional data layers (land use, soil, geology) by clicking on the button Hinzufügen to the right hand side of the Data Layer chart.
- Opening a bounding box (first left mouse click: top left-hand corner, second left mouse click: bottom right-hand corner, right mouse click: delete bounding box). The resulting bounding box should comprise the complete catchment area to be analysed.

Step 1: Preparation
- It is possible to delete local sinks from the DGM. In case the current DGM has not been filled yet, default filling should be selected from the methodology list.
- For the calculation of slope and slope orientation no further input is necessary.

Step 2: Reclass
- According to the different indices (DEM, Slope und Aspect) the corresponding map is classified.
- The standard areas and values can be applied or modified. In case of a modification values cannot be below or above the corresponding minima and maxima.
- If a data set should not be used for HRU derivation, it can be deselected (Checkbox not required).

Step 3: Waterflow
- For the derivation of the water supply network, flow accumulation and flow direction and for partial catchment areas a threshold value Minimum Size Of Basins is required.
- This parameter determines, for example, the degree of detail of the water network or the number of partial catchment areas. The threshold value determines the smalles, derivable partial catchment area and is indicated in cells (number of pixels).
- Example: A value of 1500 (and an assumed solution of 25m) results in a designation of partial catchment areas bigger than (1500*25*25)/1000000 = 0.9375km² ~ 1km².

Step 4: Outlet Watersheds
- The following steps are necessary for the calculation of a map showing partial watersheds derived from their water levels:
- Pan the water level and supply map up in the key, so both data sets are visible.
- Check with the zoom tool whether the singular water levels lie exactly on the derived water supply network. If not, modify the level layer until all levels in the watershed lie on the water sections. To do so, please proceed as follows:
- Select the level layer on the key and activate the vector editing mode of QuantumGIS

- Take the tool for panning vector points
 and relocate the corresponding watersheds
- Finally, cancel the edit mode by clicking on again and agree to save changes
- Select the level layer on the key and activate the vector editing mode of QuantumGIS
- If all water levels in the catchment area have the correct position in the water network, those levels relevant to the calculation have to be selected - use the marker tool
 .
.
- Choose the shapefile attribute on the selection list Name of corresponding attribute (ID) which represents a unique parameter for the level (integer and > 0, e.g. level ID).

Step 5: Overlay
- The intersection of all data layers creates small areas (specific layers can be disregarded by deselecting them). Those areas are not suitable as HRUs and should therefore be eliminated.
- For this purpose a threshold value is defined (Size of smallest area to remove) which determines the minimum size of an HRU (in cells).
- Example: A value of 8 (and an assumed solution of 25m) results in a designation of HRUs which is bigger than (8*25*25) = 5000m² =0.5ha

Step 6: Topology
- Fo the determination of the topological connection of HRUs (and water segments) no specific parameter input is necessary.
- The module calculates
- the N:1 topology (HRUs can drain in only one neighboring HRU/river section)
- the N:M topology (HRUs can drain in several neighboring HRUs/river sections)
- water topology (topological combination of all river sections)
- The option Enable discrete reaches is an extension of the topological derivation and its development has not yet been finished.

Step 7: Statistics
- The existing HRU map in grid format (Geo Tiff) is now converted into a shapefile. In doing so, additional features of a single HRU can be selected which are taken to the attribute chart or are supposed to be calculated.
