
For complex models it is desirable to make use of parallel computing and highly performant computer hardware. While paralellization is available both for single and multiple simulations, the utilization of performant server hardware is often a problem.
Addressing this issue, JAMS features a client-server environment (JAMS Cloud) which provides the required components:
- A stand-alone JAMS server environment with a RESTful interface provides functions to
- upload a model (including workspace and model definition) and required component libraries from a JAMS desktop client to the server
- run a simulation of that model on the server
- control the simulation on the server (check state, interrupt)
- download the model’s workspace or individual files within (e.g. results only)
- A graphical client for the JAMS server which is embedded in the JAMS model builder (JUICE)
In order to make use of the JAMS Cloud, you need access data for a JAMS Cloud server (i.e. its URL, a user name and password), the standard model builder and the model to be run on the server. For a typical remote modelling workflow, the following steps are required:
- Open your model in JUICE and make sure that it would load and run locally. Start it and check for any error messages. If everything works as expected, stop the simulation. If you want to perform parameter sampling (e.g. for parameter calibration or sensitivity analyses), prepare your model beforehand. For detailed information about setting up a sampling model, please refer to “Parameter Sampling and Calibration“.
- Press the JAMS Cloud button from the toolbar menu to open the login window.

- Provide information about
- the server URL (1)
- login user name (2)
- login password (3)
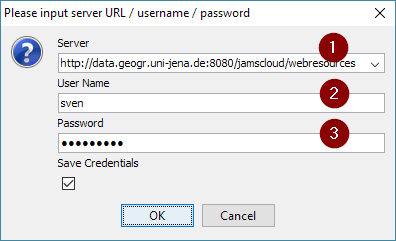
… and press OK - Upload all required model data and libraries to the server and start model simulation by pressing the “Run on cloud” button.
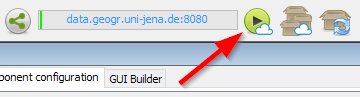
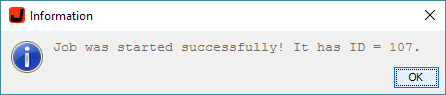
In result, the client will synchronize the model workspace, the model definition and all required component libraries with the server. Depending on network bandwidth and whether the files have already been uploaded before or not, this process can take some time. After successful synchronization, the model will be started on the server and the user will be provided with the related job ID.
- Check for your jobs and their execution state by pressing the “Browse JAMS cloud” button.
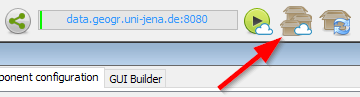
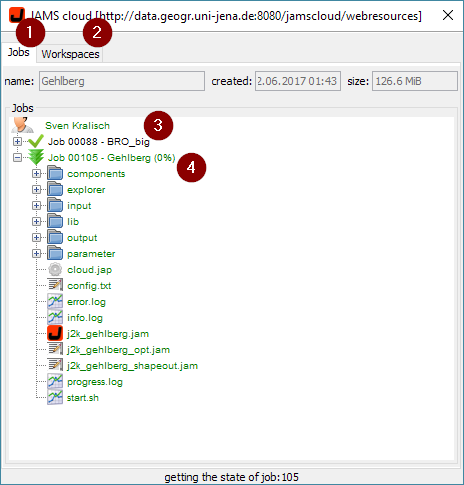
The JAMS cloud browser will show all your jobs (1) and uploaded workspaces (2). In the “Jobs” view, you will find your finished jobs (3) and your currently processed jobs (4). The jobs and workspaces are presented as a directory/file tree, allowing you to easily browse its contents.
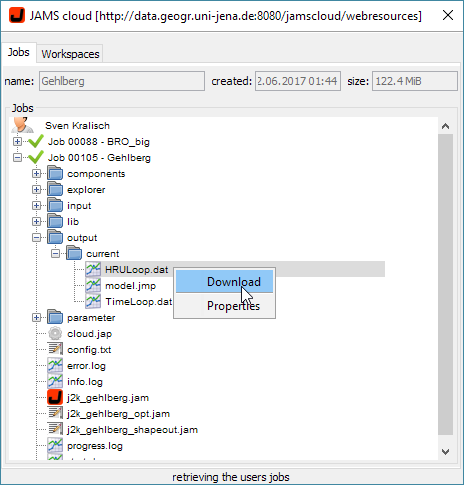
- Select and right-click any single file or the job node to download it to your local machine.
- Select the “Kill” function from the job’s context menu to interrupt a running job.
